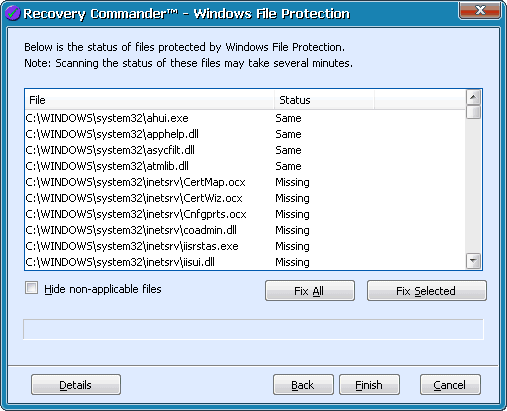
If you are using Recovery Commander on the SystemSuite Rescue Disk, you have the option of restoring a computer using Windows File Protection. Windows File Protection is applicable only to Windows XP.
When you restore a computer using Windows File Protection, Recovery Commander compares all of the files currently on your computer to the files in the Windows cache. The initial scan can take a long time to complete.
To restore a computer using Windows File Protection:
1 Start Recovery Commander from the Rescue Disk. For more information, see Starting Recovery Commander from the Rescue Disk.
NOTE: Windows File Protection is applicable only to Windows XP. You must select a Windows XP installation to use Windows File Protection.
2 Select Restore the functionality of the system, and then click Next.
3 Select Restore the system using Windows File Protection, and then click Next.
Recovery
Commander compares the files currently on your computer to the files in
the Windows cache. The initial scan can take a long time to complete.

4 If a Windows File Protection list is not found, a message appears. Click OK. Click Back to restore your computer from a checkpoint. For more information, see Restoring a Recovery Commander Checkpoint or Restoring a System Restore Checkpoint.
5 To hide files that are not applicable to the restore effort, select the Hide non-applicable files check box.
6 To fix all items, click Fix All.
7 To select items to fix, press Ctrl and click.
8 To fix selected items, click Fix Selected.
9 Click Finish to restore your computer.
See Also
Starting Recovery Commander from the Rescue Disk