The Large files scan looks for large files that might not be needed and are only taking up space. There is a default setting to hide system and application files so that these do not show up in the list. Do not change this setting unless you are an advanced level Windows user. For more information, see Editing Disk Space Saver Settings.
To scan and remove large files:
1 With Disk Space Saver open, click the Large tab.
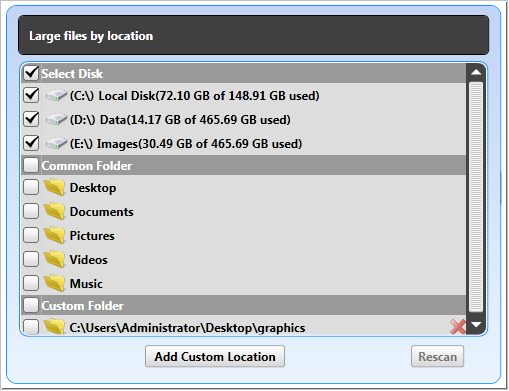
2 In the Large files by location section select the drives or folders you want to include in the scan.

To scan a custom location, you must first add it to the list. Click the Add Custom Location button and browse to the folder you want to add. After it is added to the list, select it to include it in the scan. To remove a custom folder, click the X to the right of the folder name.
3 Click Scan Now.
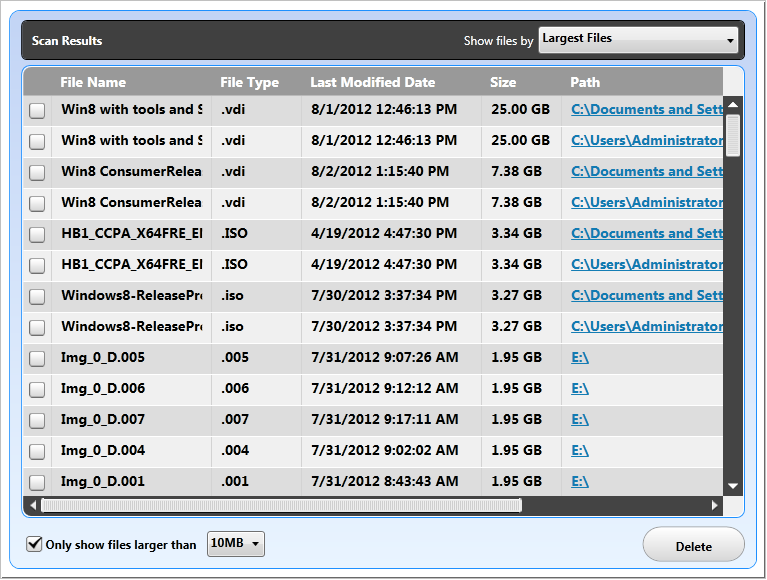
4 View the scan results and select the files you want to delete.
§ In the Disk Space Used section, view the types of files that are taking up most of the disk space.

§ In the Scan Results section, use the Show Files by menu to sort the individual files by type.

§ To change the sort order of a column, click the column title. To increase the width of a column, click the separator bar in the title and drag it.
§ To view only the files that are larger than a specific size, select the Only show files larger than option at the bottom and choose the minimum size.
5 After you select the files, click Delete.
6 Click Done.
See Also
Finding and Deleting Duplicate Files
Finding and Deleting Junk Files